How to Use ShadowSocks to Connect to b.VPN Servers on Android
*Note: You need to be a paid b.VPN user to use this feature.
Click the link below to download ShadowSocks on your device
https://play.google.com/store/apps/details?id=com.github.shadowsocks&hl=en
In case you’re not able to access Google Play, you may get an APK version of ShadowSocks at this link
https://www.bvpn.com/imgstore/setup/files/shadowsocks-nightly-4.2.2.apk
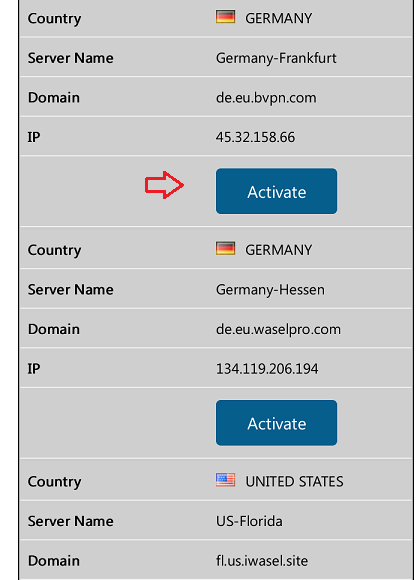
To activate ShadowSocks server, click the link below
https://www.bvpn.com/en/accounts/profile/shadowsocks_server_list/
*Hint: To find out the fastest server according to your current location, use b.VPN desktop application and check the server with least ping response time.
Tap “Activate” below the server of your choice.
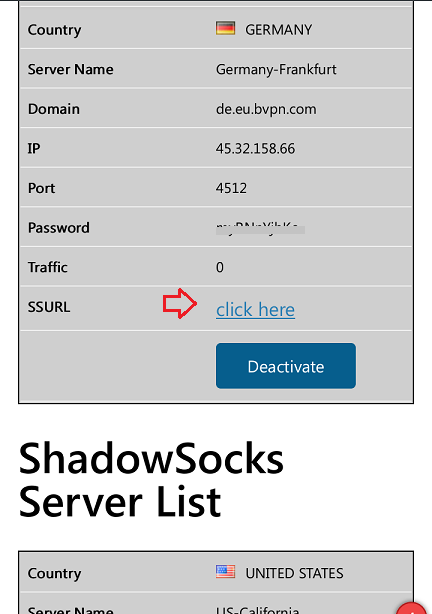
Wait a moment then refresh the webpage you’re on.
Tap “Click here” next to “SS URL”.
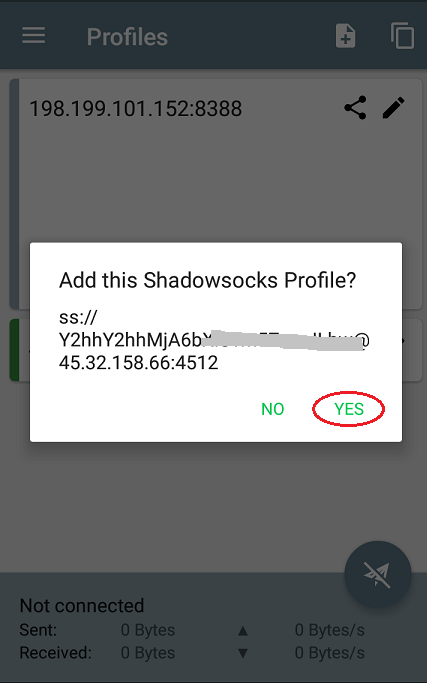
A popup message will open in ShadowSocks. Tap “Yes”.
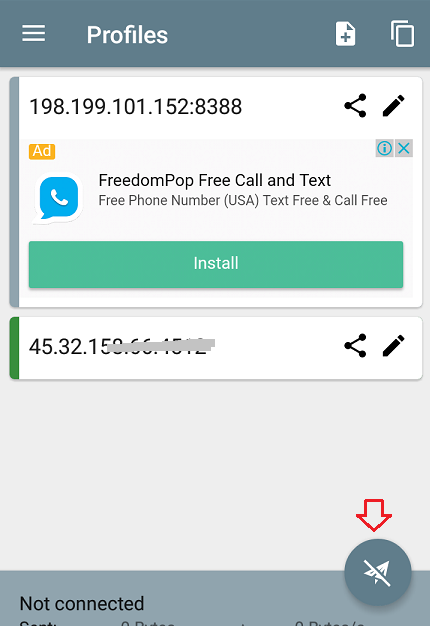
Tap the connection button referred to in the screenshot below.
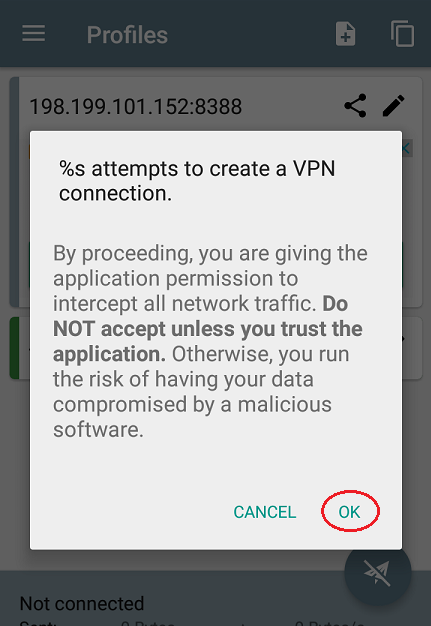
In the popup message, tap “OK”.
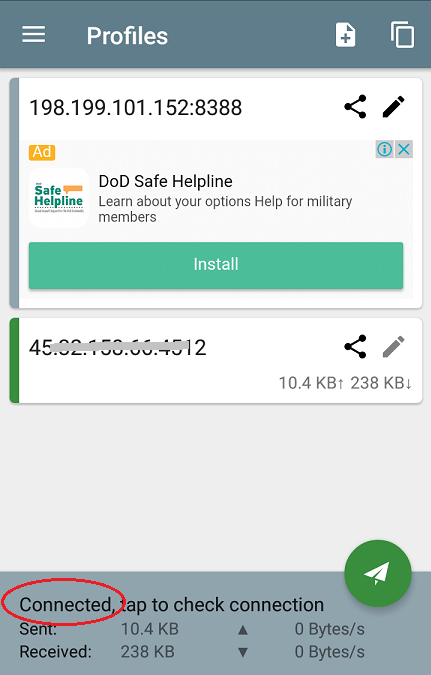
If connection was successful, you will see the word “Connected” in the footer and connection button will turn to green color.
*Notes:
In case you lose internet connection after Shadowsocks connects, you will need to deactivate/ reactivate your session. In order to do so, please visit the link below:
https://www.bvpn.com/en/accounts/profile/shadowsocks_server_list/
and click/ tap “Deactivate” button next to/ below the Server Name.
When you activate ShadowSocks server, you will receive an email including ShadowSocks session credentials which you may use to manually configure the connection and a link which you may use to automatically import connection settings to ShadowSocks client.